How to Build a Game & Learn C#
Self-Paced Workshop – Part 1
By Former Tech Elevator Instructor Matt Eland
Overview
In this short series of articles you’ll follow step-by-step basics to learn the fundamentals of C# programming by building a “guess the number” game.
This tutorial is intended for people who are interested in learning to code for the first time, but it will also be helpful to those coming to C# from another programming language.
If video learning is more your thing, this content is also available in video form.
The App You’ll Build
We’ll be building a game in which the player is asked to guess a number between 1 and 100.
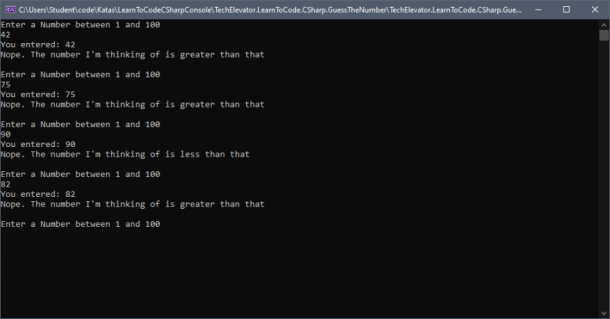
Each time the player guesses a number, the game will tell you if your guess is too low or too high. The game will continue to run until you correctly guess the randomly-generated number.
Learning Objectives
Over the course of this series you’ll get a glimpse of Tech Elevator’s 14 week full-stack C# / JavaScript curriculum and learn:
- What C#, .NET, and Visual Studio are
- How to Create a New Project in Visual Studio
- What variables are and how to create and use them
- How to display text to the user and get a response
- Expressions and how code works when running
- Executing conditional logic with if statements
- Doing repetitive logic with loops
- Generating random numbers
This specific article covers:
- Installing Visual Studio
- What C# and .NET are
- Creating and Running your first C# program in Visual Studio
Prerequisites
In order to follow along with this article, you need to first download and install Visual Studio on your PC or Mac.
The latest version of Visual Studio is available online, and the Community version is free and perfect for those learning a new language.
NOTE: Make sure you download Visual Studio and not Visual Studio Code as these are two separate products. As of the time of this writing, the latest version of Visual Studio is 2019
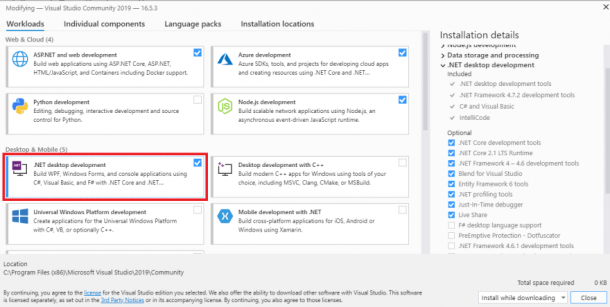
When installing Visual Studio, you will be provided with many choices for things to install. In general, the defaults are good, but the important thing for this article is to make sure that .NET desktop development is checked as pictured below:
Introducing C# and .NET
The program we’ll be creating today uses the C# programming language. C# is the flagship programming language of Microsoft’s .NET development platform.
C# was released in 2001 as a modern object-oriented programming language inspired by C++ and Java. Using C# we can develop mobile, desktop, and web applications.
C# runs on the .NET platform and can talk to code written in other .NET programming languages, such as F# or Visual Basic .NET.
You’ll hear the terms .NET Core, .NET Framework, and .NET 5 (and beyond) thrown around. Each one of these is a different version of .NET. This article is written using .NET Core which is the latest version of .NET as of the time of this article. However, these concepts and code translate well to other versions of .NET.
Creating the Application
Open Visual Studio and choose to create a new project.
When prompted, find the Console App (.NET Core) option in the list of projects. Make sure that C# appears in the icon and list of tags as pictured below:
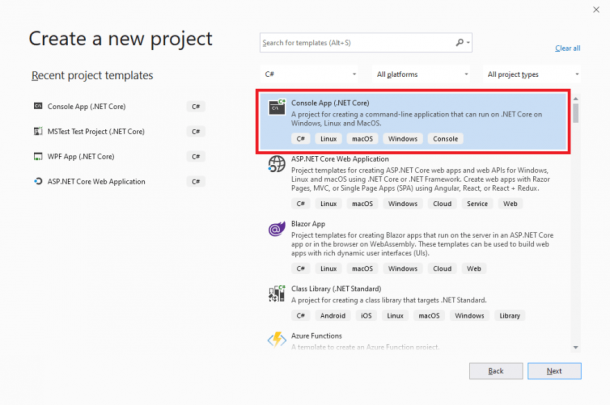
Click Next to continue.
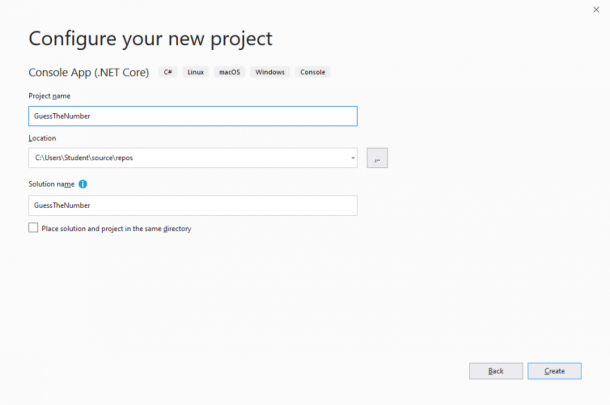
From there, you will be prompted to name your project and select where it should be stored on your machine. The name and location don’t matter, but I’m using GuessTheNumber for mine.
Click Create when ready and your project will be created.
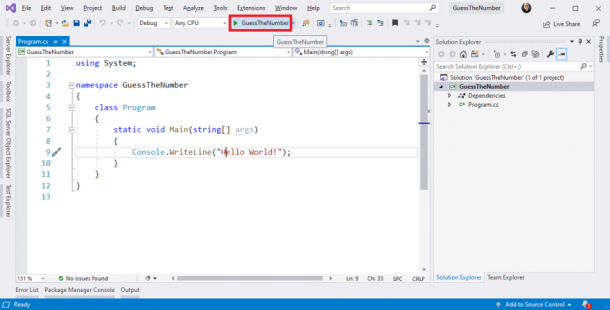
If you followed the previous steps, you should now see something like the following if you’re running on Windows:
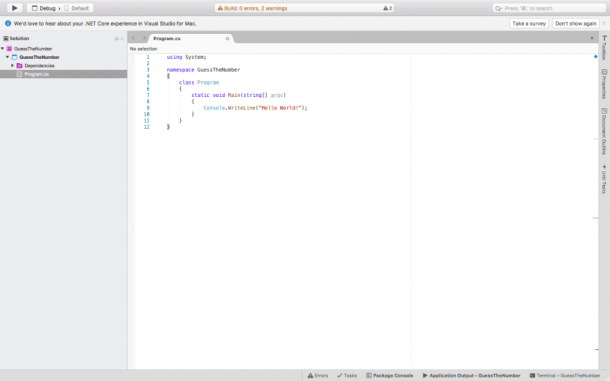
You’ll see something like this if you’re on a Mac:
Understanding our Program
Let’s take a look at the code that Visual Studio generated in more detail:
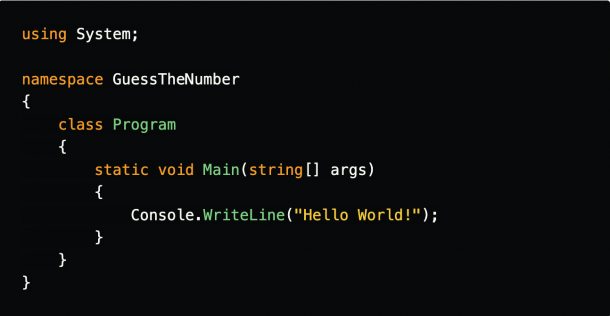
We start with the using System; statement. using is how C# knows what other pieces of code are going to be needed for this specific file. In this case, we want the System namespace so we can use Console later on in this file.
The next line, namespace GuessTheNumber, contains a namespace with the name of our project in it. This would be used by other code to add using statements to pull in our code. However, in this article we’ll only be working with this single file.
The class program declaration and its opening and closing {}’s denotes a class. A class is too complex to get into in an introductory article (we dedicate over a week of curriculum at Tech Elevator to the things you can do with classes).
For now, know that classes can be used to organize related pieces of code. In this case the Program class represents the application we are writing.
Next, we have a particularly frightening static void Main(string[] args) line. This is syntax defining a method named Main that can be run by other code. The main method is a special method that will be run when we run our application.
Later on in programming we use different methods to organize pieces of code and calculate and return values, but for now, think of Main as the thing that will be executed when your program runs.
Finally, we see Console.WriteLine(“Hello World!”);. This line tells .NET to display a message on the command line when the program is run.
Hello World
Let’s run the program now and see how it works.
In order to run your program, click the green arrow in your toolbar as pictured below:
Once you click run, Visual Studio will show some new windows to indicate that it is building your application. This will take a few seconds, but once complete you should see a window appear with the text “Hello World”:
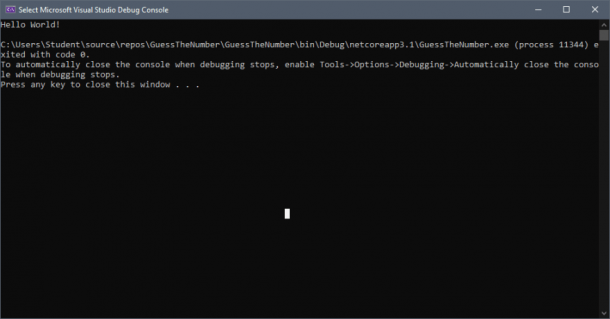
Congratulations! You just created and ran your first program.
Next Steps
In the next article, we’ll discuss variables and expressions and how .NET evaluates our code when the application runs.
Continue the workshop in the next session.

Matt Eland
Matt has worked on services, desktop applications, single page JavaScript applications, mobile apps, and web applications in various .NET, Java, and JavaScript technologies for 30+ years. He loves mentoring and writing about software development. He leads instruction at Tech Elevator Columbus.